Difference between revisions of "SHA2017Badge/Documentation/Assembly"
Jump to navigation
Jump to search

| Line 11: | Line 11: | ||
The first thing to do after starting up the badge for the first time is do an [[OTA]] (Over The Air) update. | The first thing to do after starting up the badge for the first time is do an [[OTA]] (Over The Air) update. | ||
This will make a connection with the [[hatchery]] and download the latest available version of the badge software. | This will make a connection with the [[hatchery]] and download the latest available version of the badge software. | ||
| + | |||
| + | After doing the OTA upgrade you can proceed with [[SHA2017Badge/Documentation/First_boot]]. | ||
== Original Flyer == | == Original Flyer == | ||
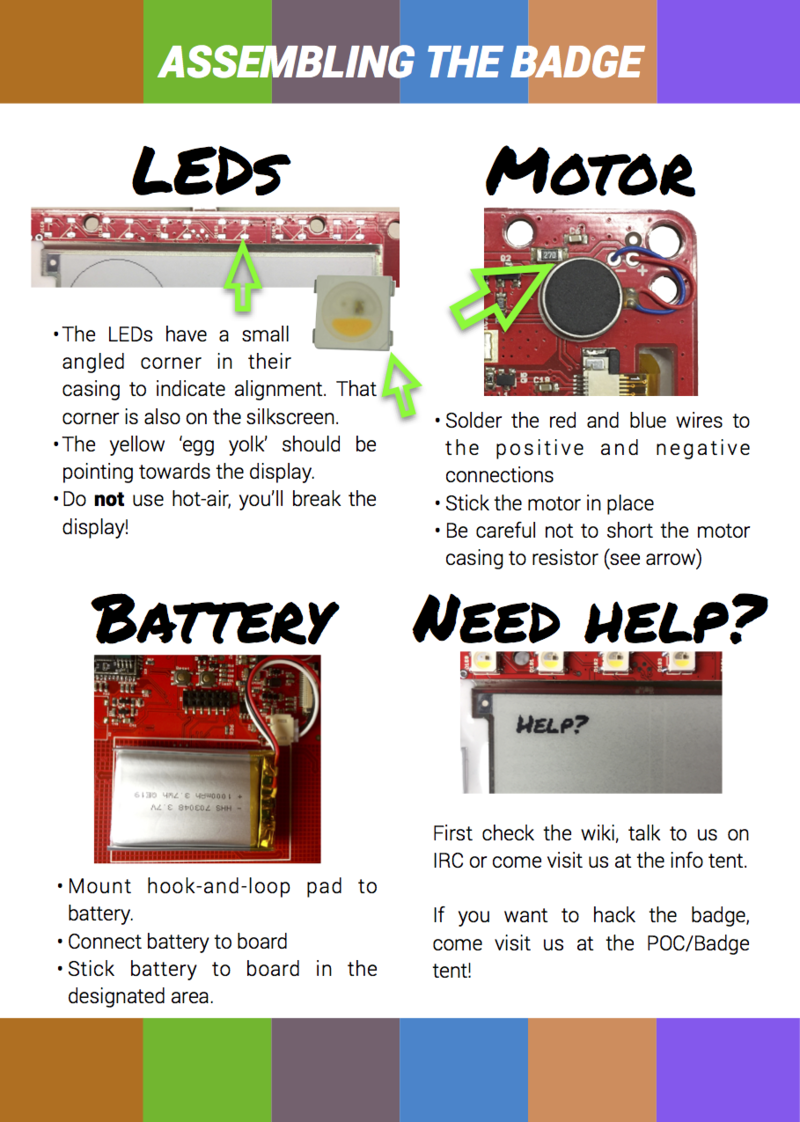
[[File:Flyer badge 2 1.png|800px|frameless|center|Badge flyer front]] | [[File:Flyer badge 2 1.png|800px|frameless|center|Badge flyer front]] | ||
[[File:Flyer badge 2 2.png|800px|frameless|center|Badge flyer back]] | [[File:Flyer badge 2 2.png|800px|frameless|center|Badge flyer back]] | ||
Latest revision as of 18:38, 22 February 2019
At SHA2017 a nice flyer (see below) was supplied in the bag that contained the badge and components.
If you managed to get hold of a never used (prestine) badge after SHA2017 you need to do some magic to get things going:
WiFi setup[edit]
If you want to be able to follow the instructions on the flyer and re-create the full SHA2017 experience, setup a WiFi network with these characteristics:
- SSID:
SHA2017-insecure - no security options - just an open network
OTA upgrade[edit]
The first thing to do after starting up the badge for the first time is do an OTA (Over The Air) update. This will make a connection with the hatchery and download the latest available version of the badge software.
After doing the OTA upgrade you can proceed with SHA2017Badge/Documentation/First_boot.